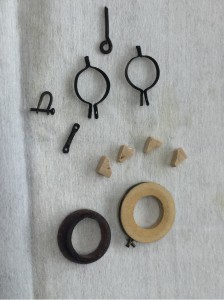
 MODELSHIPWAYの1/64のBlueNoseです
今回は、フォアマストの加工(その1)です。
前回#13(12月15日)の続報です。
米川会員製作
A Build Log The 14th A work of Yonekawa
フォアマストの根元部の製作
Production of the heel part of the fore mast
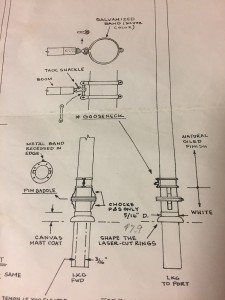 デッキプレートのリングを黒檀で作り、ビレーピンを取り付けるリングはカステロを木工旋盤で成形、真鍮板で金具のリングを作成
I make the ring of the deck plate with ebony.The ring installing a belay pin uses refuse castero.Mold it with a woodwork lathe; is making mashita with a brass board at the ring of metal fittings.
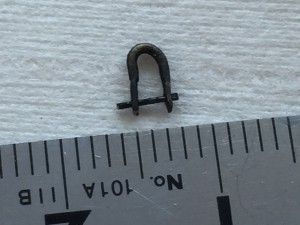 シャックルは真鍮線を曲げ、両側を叩き潰しその部分に0.5ミリのドリルで穴を開け、0.5の真鍮線の片側を潰したものを差し込みこれで何となくシャックルに見えるか、ちょっと歪な形
これだけ小さいとやはり難しい
The processing of the shackle bent brass route and smashed up both sides next.Cut a hole open with a drill of 0.5 millimeter and inserted the thing which smashed one side of 0.5 brass line in the part.
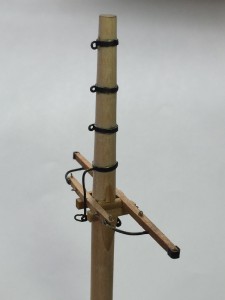
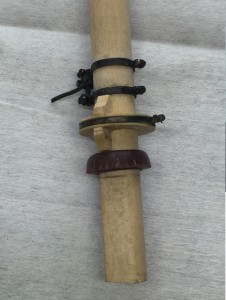 マストに取り付ける、図面の雰囲気は出てるか?
The atmosphere of the drawing to get on a mast comes out.
ロアーマストの上部に取り掛かる
ここも難しい金具だらけだ
I start the upper part of the lower mast.
Here is full of metal fittings hard to please, too
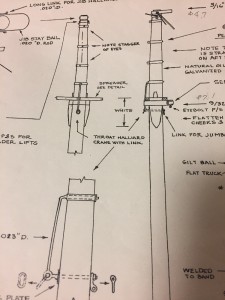 まず、マストに巻き付く輪っかに小さなリングを取り付ける
双方のリングが直交すること
At first I install a small ring in circle to coil itself around a mast.
Both rings be perpendicular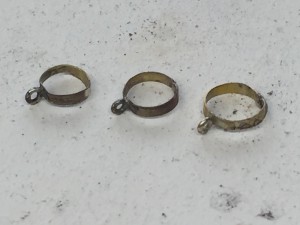
まず、真鍮の平板を耐火レンガの穴に入れ垂直に立てる
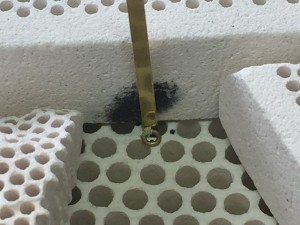 小さなリングを作り、レンガの上で密着させる
そうすることで直交の関係を作る
Begin the loss of the firebrick and make a flat board of the brass perpendicularly next.
I make a small ring and let you adhere on a brick.
I put on silver-soldering in the right angle and was made delicious.
うまく直角にロー着け出来ました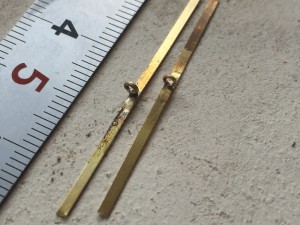
これをマストに巻きつけてニッパで切断した部分を再度ロー付け、これで上記のリングが完成
Gain silver-soldering again and do the part which I can coil myself around a mast and cut with a nipa.
The ring mentioned above is completed in this.I produce the other parts.
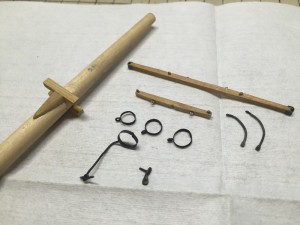 他の部品も製作、図面のマストを貫通した金具はそのままでは製作できないので、入口部、出口部を別々に作り貫通させたように
見せかけることにする
I cannot just make the metal fittings which penetrated the mast of the drawing.
 I decide to pretend that I let I make a case oral region, an exit part separately and penetrate it
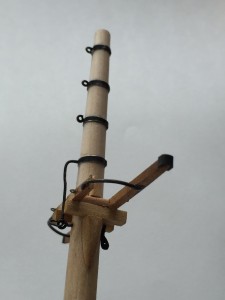
I try to assemble it
組み立ててみる
何となく感じは出ているか? でもロー付けはやはり難しい
ノウハウを掴むまで暫く掛かりそうです。
Is the feeling given somehow?But after all the silver-soldering charge account is difficult.
It seems to take it for a while till I catch the know-how.
Produktion 1 von 14 #Vorhand Maste.Produktion des Quellenteiles des Vorhand Mastes.Ich mache den Ring vom Deckteller mit Ebenholz.Der Ring, der eine belay-Nadel installiert, benutzt Müll castero.Formen Sie es mit einer Holzwerkdrehbank; macht mashita beim Ring der Metallanproben mit einem Messingausschuß.Die Verarbeitung der Kette bog Messingstrecke und zerbrach auf beidem, unterstützt danach.Schnitt ein Loch offen für eine Bohrmaschine von 0.5 Millimetern und legte die Sache ein, die eine Seite von 0.5 Messingfalte im Teil zerschlug.Die Atmosphäre der Zeichnung, um einen Mast anzuziehen, kommt heraus.Ich beginne den oberen Teil des niedrigeren Mastes.Hier ist von Metallanproben voll, schwer auch zu gefallen.Zuerst installiere ich einen kleinen Ring in Kreis, um sich um einen Mast zu wickeln.Beide Ringe sind senkrecht.Fangen Sie den Verlust am firebrick an und machen Sie nächstem senkrecht aus dem Messing einen flachen Ausschuß.Ich mache einen kleinen Ring und ließ Sie auf einem Backstein haften.Ich setzte darauf Silber-soldering@in der rechte Winkel und wurde köstlich gemacht.Gewinn, der wieder Silber-lötet, und macht den Teil, den ich mich mit einem nipa um einen Mast und einen Schnitt wickeln kann.
Der oben erwähnte Ring wird darin vervollständigt.Ich produziere die anderen Teile.Ich kann nicht nur die Metallanproben machen, die den Mast von der Zeichnung durchdrangen.Ich entscheide mich vorzugeben, daß ich ließ, mache ich einen Fall zu mündlichem Gebiet, ein Ausgangsteil getrennt und dringt es durch
Ich bemühe mich, es zusammenzusetzen.Ist das Fühlen gegeben irgendwie?Aber nach dem ganzen Silber-lötenden laufenden Konto ist schwierig.Es scheint es für eine Weile zu nehmen, bis ich die Sachkenntnis fange.

