
MODEL SHIPWAYのBluenoseは1/64のスケールです。
第4回目です
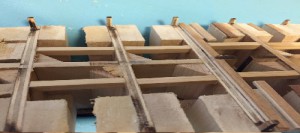
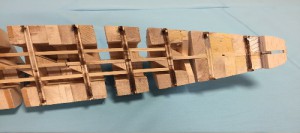
Bluenoseは真ん中辺りでデッキに段がついており、後ろ側が少し高いので、それぞれのデッキが綺麗な面になるように定規を当てながらフレームの上面、フィラーの上面を同一面になるよう削ったり、足したりします。
時間がかかる割にはあまり代わり映えのしないここまでの作業ですが
でも、ここで手を抜くと後で大きな後悔をします。
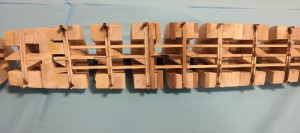
下地が荒いと外板貼りで修正は効きません。ベコベコの外板となります。
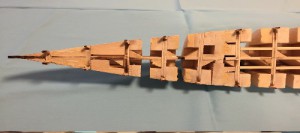
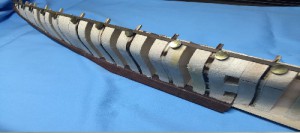
やっとのことでようやく外板貼り、1ミリ厚のウォールナットを一番上の基準板より貼り付けます。
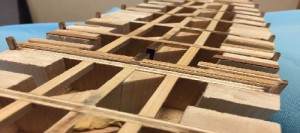
ここまでフィラーを入れておくと外板貼りが非常に楽で綺麗にできます。
#5へ続く
It is the fourth
A step points out Bluenose on a deck in center area.
In addition, some rear are high.
Therefore, each deck is clean; sharpen it so that is acted.
I sharpen the top surface of the frame, the top surface of the filler while winning a ruler to become the same aspect and add it.
It is the work that it is replaced, and the brilliancy does not do very much although it takes time.
However, I will do big regret later when I do a slipshod job here.
If a base is rough, a gaiban* ride revision does not work.
I become the shell of bekobeko.
I enter to finally put a shell at long last.
I stick the walnut of the 1 millimeter thickness than a top standard board.
A gaiban* riga emergency can clean it for comfort when I put a filler to here.